Applications
 Part of the Oxford Instruments Group
Expand
Collapse
Part of the Oxford Instruments Group
Technical Article
Author: Sacha Guyer
Published: 01 Mar 2022 · Last updated: 15 Mar 2022
In Imaris 9.9 it is possible to use machine learning pixel classification using the Fiji/ImageJ Plugin called “Labkit” (https://imagej.net/plugins/labkit). This article explains the steps required to configure Imaris 9.9 to work with Labkit. Configuration in Fiji as well as in Imaris is required.
Download and install Fiji from https://imagej.net/software/fiji/downloads. Fiji is distributed as a portable application. You don’t need to run an installer, just download and extract the zip file to a folder. We will use C:/fiji_win64 in this article.
Labkit is a Fiji plugin that needs to be activated after the installation of Fiji.
Open Fiji: C:/fiji_win64/Fiji.app/ImageJ-win64.exe
Choose the menu “Help / Update…”
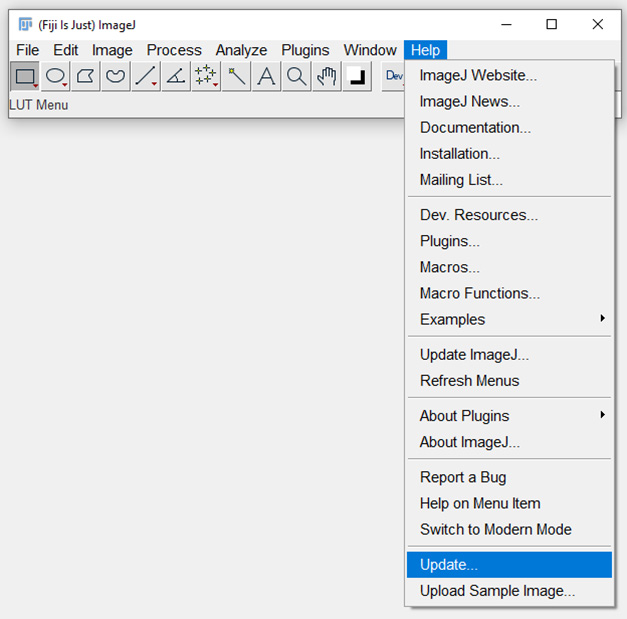
This will perform some updates and ask you to restart Fiji.
Restart Fiji and again click “Help / Update”. This will show the ”ImageJ Updater” Dialog.
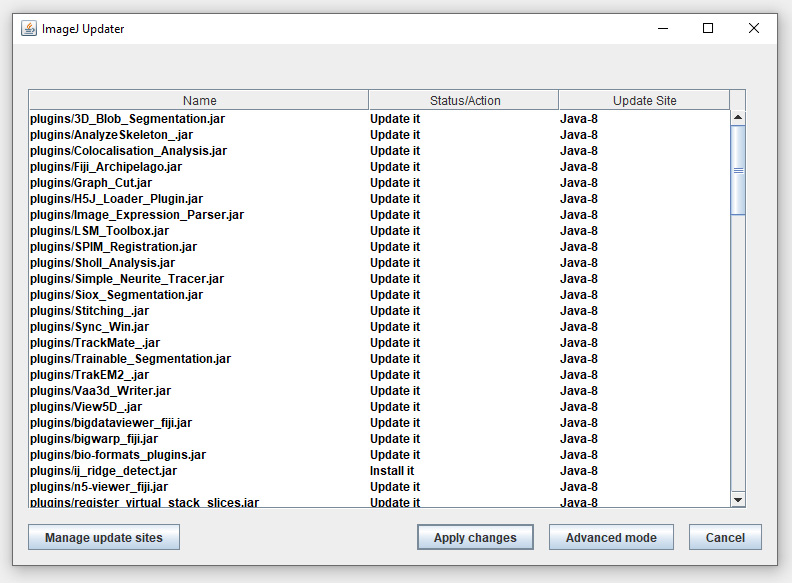
Press the “Manage update sites” button to open the “Manage update sites” dialog. Check the “clij” and “clij2” items. This will add support for GPU accelerated labkit segmentation. Labkit segmentation also works without clij and clij2, but it is then much slower. It is therefore recommended to use clij and clij2.
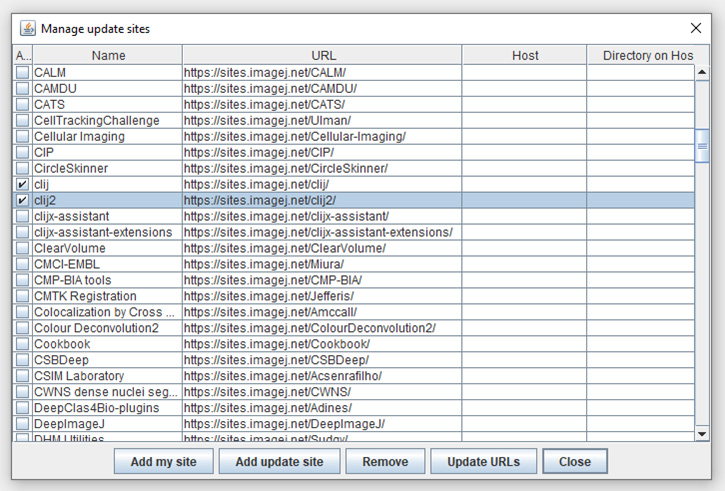
In the same dialog, press the “Add update site” at the bottom.

Enter a new site with name imaris-labkit (second column) and url https://sites.imagej.net/imarislabkit/ (third column), and check it (first column).

Click Close to close the “Manage Update Sites” dialog.
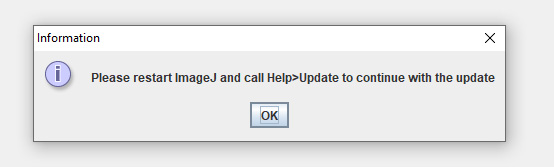
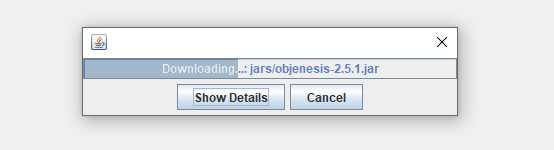
Back in the “ImageJ updater” dialog, click Apply changes. This will download some files and display a progress for a few minutes.
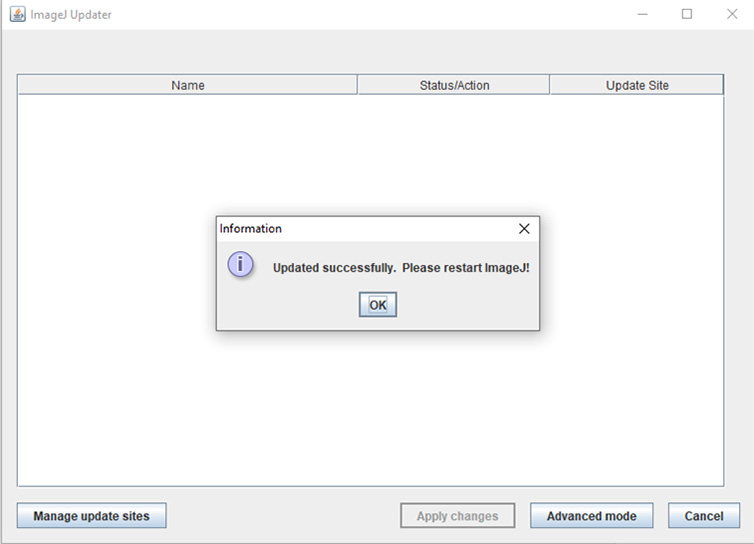
Fiji then displays a message that the update was successful:
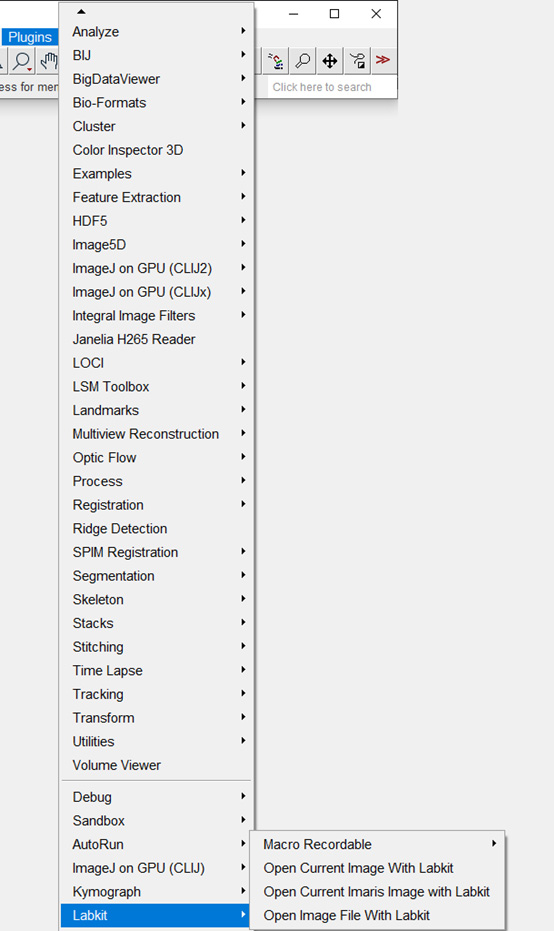
Restart Fiji and ensure that Labkit is present in the Plugins Menu:
Labkit is now ready for use with Imaris.
Download and install Imaris 9.9 from the customer portal (https://portal.bitplane.com)
In “Preferences / Custom Tools / Fiji”, press the “Browse” button and select the ImageJ-win64.exe application in the folder where Fiji has been extracted to.

Press “Ok” to close the Preferences.
Imaris is now ready for use with Labkit.
Open a Dataset (e.g. the Imaris Demo Dataset DrosophilaEggChamber_with_objects.ims)
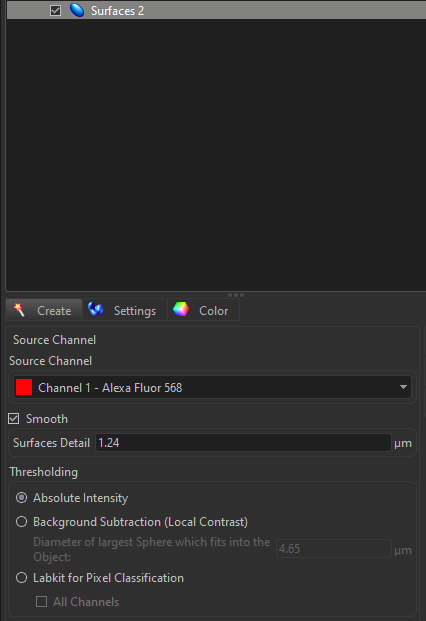
Create a Surfaces object and advance to the second wizard step. There is now a new Thresholding option “Labkit for Pixel Classification”. Select this option and press the Next button. This will open Labkit in Fiji and show the imaris image. On the Labkit webpage (https://imagej.net/plugins/labkit) there is a short video showing how to use Labkit.
If something is wrong with the Imaris and Labkit Configuration, the Labkit for Pixel Classification is greyed out and the tooltip provides more information what the problem is:


© Oxford Instruments 2026