
Applications
 Part of the Oxford Instruments Group
Expand
Collapse
Part of the Oxford Instruments Group
Tutorials
Published: 01 Feb 2012 · Last updated: 10 Feb 2021
Tags: startwithimarisvisualization
Observing the exterior shape of a rendered 3D model may not always provide the best visualization of your sample. To achieve a more desired view, it may be necessary to uncover hidden regions by re-slicing the image data in a different orientation.
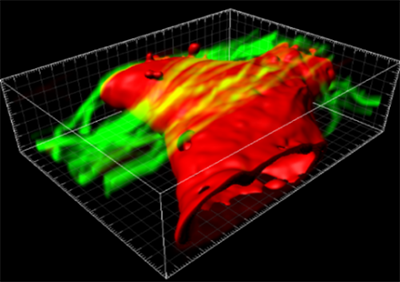
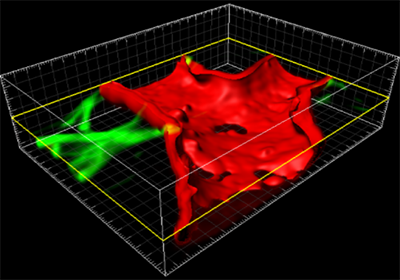
In Imaris, you can better examine the internal structures of your 3D data by using the Clipping Plane. The Clipping Plane, and related tools, allows you the ability to re-slice your data sets in any chosen rotation. The Clipping Plane truncates the image along a given plane in 3D space by cutting away objects on one side of the plane.
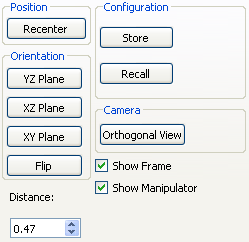
When you select the Clipping Plane icon the Object List is updated. In the Object Properties area the Clipping Plane Settings tab appears. Under the Settings tab, you can adjust the position and orientation of the Clipping Plane, control the camera view, and manage visibility of the Frame and Manipulator.

The Orientation buttons specify three orthogonal positions for the Clipping Plane. Additionally, the Flip button rotates the Clipping Plane 180 degrees allowing you to view the other side of the sample.
After changing the position and/or orientation of the Clipping Plane, the new configuration can be saved by clicking on the Store button. The previously stored position can be loaded by selecting the Recall button. The location of the Clipping Plane is also displayed in the Distance field.
The clipping plane can be moved and rotated to any angle, allowing you complete control over which portion of the object is visible and which portion is hidden.
In the viewing area, the Clipping Plane consists of a colored frame with a white double spindle in the middle. You can freely rotate the Clipping Plane by moving the thinner spindle with your mouse. And by moving the thicker spindle you can adjust the position of the Clipping Plane within the image. In addition, you can change the position by dragging the Clipping Plane frame.

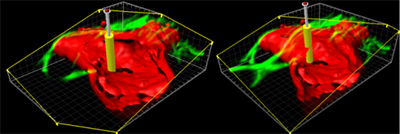
While positioning the Clipping Plane, the image is constantly and interactively updated. When you are pleased with the result, press the Snapshot button to save an image of the data currently displayed in the viewing area. During the creation of a snapshot, you can choose to hide or show the Clipping Plane Frame and/or Manipulator by checking/unchecking the Show Frame/Show Manipulator option under the Settings tab.
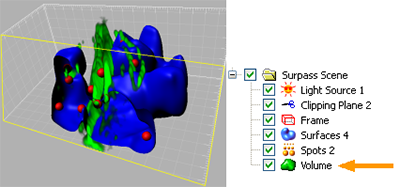
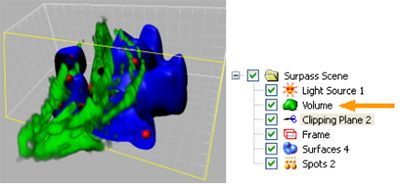
Lastly, the Clipping Plane only affects objects that are in the same group as the Clipping Plane and are found below it in the Surpass tree.
Also, Imaris allows multiple Clipping Planes providing yet another effective way to generate the best presentation of your data sets.

© Oxford Instruments 2026